Unlocking Creative Projects with the Colorful Floral Alphabet F
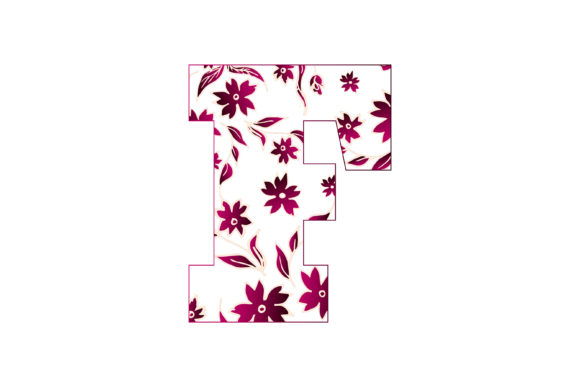
When crafters, small business owners, and designers search for personalized lettering, the Colorful Floral Alphabet F often catches the eye. It’s not just a single decorative letter; it’s a complete digital file package offering a vibrant, flower-filled letter F that can be printed on mugs, apparel, keychains, stickers, and more. People are drawn to it because floral monograms feel fresh, stylish, and emotionally resonant for gifts, branding, or home décor. However, excitement over a pretty preview sometimes leads to rushed decisions that reduce the final product’s impact. Understanding what this file really includes and how to use it correctly saves time, money, and frustration.
What’s Actually Inside the Colorful Floral Alphabet F Download
Before you upload anything to a cutting machine or send a print order, know exactly what you are receiving. This specific design typically bundles multiple file types: .EPS (scalable vector), .JPG (raster with a white background), and .PNG (raster with transparent background). The product description mentions included support files and a high 300 dpi resolution, which is essential for crisp prints. The vector EPS can be resized infinitely without losing quality, while the PNG is ideal for digital mockups or printing on colored surfaces where you want no white box. The JPG works well for straightforward paper prints.
A common oversight is assuming all file types are identical in usability. Many beginners open the JPG, enlarge it by 400%, and wonder why edges turn pixelated on a poster. That’s because JPG is resolution-dependent, while the EPS and sometimes the PNG (if large enough) are better for significant upscaling. Check the pixel dimensions of the PNG before committing to oversized projects. A high-quality 300 dpi file sounds great, but if the original PNG is only 5 inches wide, printing it at 12 inches will soften details regardless of dpi claims. Always preview actual file dimensions when precision matters.
Choosing the Right Format for Your Specific Application
One of the most repeated mistakes I see is using the wrong format for the job, then blaming the design. For a t-shirt printed with direct-to-garment (DTG) methods, the transparent PNG is usually the best friend. For sublimation on a mug, an EPS or high-resolution JPG within a design template works beautifully. For vinyl cutting on a Cricut or Silhouette, you absolutely need a vector file like EPS, or possibly a clean SVG (though this package might not include one, so check). Trying to cut a JPG results in a messy outline you don’t want. I’ve watched creators download a beautiful floral letter F, then struggle for hours tracing a pixelated edge because they skipped reading the file list. If you plan to cut heat transfer vinyl, verify whether an SVG is explicitly included or if you need to auto-trace. Auto-tracing can destroy intricate floral details, turning delicate petals into blobs. Always test trace on a small section first.
The Hidden Trap of Color Assumptions
The Colorful in the name is a promise, but delivering that vibrancy requires you to manage color settings. A design might look radiant on your bright, calibrated monitor, yet print dull or muddy if your printer uses CMYK while the file is in RGB. JPEGs and PNGs are typically RGB, which is perfect for screen use and many home inkjet prints. EPS files can sometimes carry CMYK or RGB data. When you order prints from a professional service, they often expect CMYK. If you send an RGB file without conversion, the automatic translation may shift delicate pinks to brownish tones or mute the sunny yellows. This is a quiet disappointment that happens far too often.
My advice: Before placing a large order for stickers or apparel, ask your printer for a color profile recommendation. Then, if you have the software, soft-proof the design. If you don’t have advanced tools, request a printed proof sample. A single test print on the actual material can prevent a hundred pieces of wasted merchandise. And never trust a phone screen to judge color accuracy. It’s better to invest that quick check than to blame the lovely floral letter F for a result caused by a simple color space mismatch.
Scaling Without Losing the Delicate Floral Details
The Colorful Floral Alphabet F is intricate. Thin leaves, layered petals, and subtle gradients demand respect during resizing. Enlarge too much from a raster file, and you see jagged artifacts. Reduce too dramatically for a tiny keychain, and fine lines might become too thin for a printing method to hold. Screen printing, for example, has minimum detail thresholds. If a floral stem shrinks below 0.5 points, the ink may simply not transfer cleanly.
Use the EPS file whenever you need to scale significantly. Vector paths remain mathematically smooth, so the letter F can stretch from a small sticker to a large poster without degradation. If you must work with the PNG, start with the highest resolution available and only downscale—never upscale past 100%. For very small items like earrings or mini keychains, consider simplifying the design slightly by thickening thin elements, though this alters the original artwork. A better approach is to choose a product that naturally displays the detail, like a flat ceramic ornament or a tote bag, rather than forcing it onto an inch-wide space.
Integrating the Letter F Into Cohesive Designs
Another frequent pain point: slapping the floral letter onto a background that fights it. The design often contains soft, luminous colors that clash with a harsh neon backdrop or a busy pattern. Because the PNG has a transparent background, you gain freedom to layer, but that freedom invites chaos if you ignore contrast. I’ve seen a gorgeous floral F become invisible on a similarly colored heather gray shirt, because the pastel blooms blended right into the fabric. The intended focal point disappeared.
Test your composition on a screen by temporarily setting the background to black and white. If the letter F loses its silhouette, adjust. Use a subtle offset path or a thin stroke in white or a darker matching shade to create separation. Many professionals add a gentle shadow behind the floral alphabet to lift it off the product. This simple technique preserves transparency while adding readability. For products like mugs, remember the design will wrap; avoid placing critical petals right on the handle area or the rim where distortion occurs.
Licensing and Commercial Use Misunderstandings
A less visible but costly mistake is assuming any purchased digital file allows unlimited commercial use. When you plan to sell t-shirts, stickers, or mugs featuring the Colorful Floral Alphabet F, verify the license terms in the product description or support files. Some designs are sold for personal use only, meaning you cannot sell items with that letter. Others permit commercial use but limit the number of end products. I’ve met small business owners who had to recall listings because they overlooked this detail. Read the included support files; often there’s a text document clarifying rights. If it’s ambiguous, message the seller before you invest in inventory. Protecting your business from copyright complaints is not paranoia—it’s smart planning.
Print-Ready Doesn’t Always Mean “Ready to Print”
The phrase “ready to printed on keychain, Mug, t-shirt, sticker…” is a great starting point, but it’s not a magic button. You still need to place the design correctly in a template, mirror it for certain transfers, and weed properly if cutting vinyl. For a mug, the design might need to be rotated to account for handle placement. For a t-shirt, standard full-front placement often looks too low. The center of the floral letter F should sit around 3–4 inches below the collar, not dead center of the shirt. Measure twice. I suggest printing a paper copy of the design at actual size and pinning it to the garment to confirm positioning before applying heat. That small step eliminates the heartbreak of a crooked, permanently bonded mistake.
Practical Checks Before You Click “Buy” or “Print”
- File list: Confirm the download includes the EPS, JPG, and PNG you actually need. If you rely on SVG for cutting, this specific set may require conversion; know your software capabilities.
- Resolution and size: Open the PNG once and check its actual pixel width/height. Match that against your largest intended print dimension.
- Color mode: Identify whether your output method demands RGB or CMYK, and convert preemptively if you can. Keep backups.
- Test on scrap: Before committing to final material, print or cut a sample. A humble test on copy paper or a spare vinyl piece reveals hidden issues like missing petals or color shifts.
- Background compatibility: View the floral F on a mockup of your chosen item. Confirm the transparency edge is clean and not haloed with white pixel fragments.
- License clarity: Locate the license information. If none exists in the folder, contact the creator. Assumptions can be expensive.
Avoiding the “I’ll Just Edit It Later” Trap
Many people download the Colorful Floral Alphabet F and think they can easily change the flower colors, remove a background element, or add text within the letter. Editing a floral EPS in vector software like Adobe Illustrator or Inkscape can be complex if you’re unfamiliar with grouped objects and compound paths. The bouquet might be built of hundreds of tiny overlapping shapes. Attempting to recolor quickly with a paint bucket can leave ugly gaps. If customization is essential, consider duplicating the layer and adjusting opacity with overlays, or use a professional to edit. Alternatively, accept the design as-is and choose product colors that harmonize. Often, the original color palette is carefully balanced; altering one hue can throw off the entire botanical feel. Trust the artist’s eye when you’re unsure.
Maximizing the Impact for Branding and Gifts
When used thoughtfully, this floral letter F adds a personal, premium touch. For a logo, incorporate it into a badge style. For wedding favors, print it on seed packet envelopes or wax seals. The key is consistency across all items. If you’re making a matching set—say a mug, a tote, and a sticker—ensure each reproduction uses the same source file and color profile. Varied output settings can make the flower shade shift from peach to salmon between products, eroding the cohesive feel. A little discipline in file handling lets the design’s cheerful, botanical character shine exactly as intended.
Ultimately, the Colorful Floral Alphabet F is a versatile, joyful resource that thrives when paired with a careful, informed approach. Avoid the hidden speedbumps, and you transform a simple letter into a memorable piece of art that people love to wear, display, or give. That’s the real value behind the beautiful petals.